I have attached one sample resume (only for information purpose)
SAP BASIS Consultants can create their own resume by referring this resume.
Summary:
Overall 5 years of experience in IT industry out of which nearly 3.3
years of experience in SAP-R/3 environment as a SAP BASIS Administration..
Skills @ SAP R/3:
§ Installation of SAP
servers and post installation activities
§ Applying Support packs and
Kernel Up gradation
§ Generating Solution
manager key for the Landscape as required
§ Time based and event based
Scheduling of background jobs and monitoring them
§ Client Administration
including client copy / export / import / delete
§ User Management like User
Creation, deletion of user, users locks
§ Analyzing of missing
authorizations and assigning Roles to users
§ Profile maintenance
through PFCG
§ Transport
setup and management
§ Download and applying
Support Patches and SAP Notes
§ Performance monitoring and
fine tuning
§ Maintaining Profile
parameters
§ SAP spool configuration
§ Analyzing short dumps
§ Transports in ABAP and
Java Environments(Using SDM)
§ Performing Pre & Post
System Refresh activities
§ CUA
Configuration
§ Core
Knowledge in DBA
§ Publishing
Internal ITS
§ Installing
WebAS Java as add-on
§ Worked
with Configtool and Visual Administrator
§ Apply
java patches through SDM
Academics:
Ø M.I.T MAHE, Manipal In
the Year 2003
Ø B. Sc Nagarjuna University In
the year 2000
Technical Skills:
Ø Operating System Windows9x/NT4.0/2000/XP/2003,
Unix
Ø ERP SAP R/3 4.6C/4.7E, ECC 5.0
and ECC 6.0
Ø New Dimensional Products of SAP
Solution Manager 4.0
Ø RDBMS Oracle, Ms SQL
Job Profile:
Ø SAP Basis Consultant Infotech
Enterprises Ltd, Hyderabad June 2008 to present.
Ø SAP-Basis Consultant Intelligroup, Hyderabad
Jun-06-May
08
Ø Systems Engineer Softrain
Maintenance Systems, Hyderabad Jan 05-May 06
Ø Lab Faculty Shri
Chaitnya Enterprises, Bapatla Dec
03- Dec 04
Work Experience:
Project#1 Get Engine Manufacturing
Client Pratt &
Whitney, Canada
Role SAP Basis Consultant -Support
Organization Infotech Enterprises, Hyderabad
Duration June 2009 to till date
Role Description
- Created users and assigned the roles to the users.
- TMS configuration and Change request management.
- Monitoring Background jobs, re-scheduling, canceling long running
jobs
- File system monitoring
- Spool & print management
- Checking Failed update record & system logs
- Short dump analysis, managing lock entries, lock/unlock
transaction codes, displaying and monitoring of Database and Application
servers, managing user sessions
·
Configured Operation Modes and Profile parameters
maintenance
- Implemented Kernel Upgrade and Applied
Support Packs
- Set up Central User Administration (CUA) to manage multiple
systems/clients
·
System Refresh Activities, JAVA Schema Export
& Import
·
Package deployment using SDM
·
Trouble shooting and monitoring with printers and
system hardware
·
Contribute to the documentation for the various
tasks that we perform for daily monitoring
Project#2 Get Engine Manufacturing
Client Pratt &
Whitney, Canada
Role SAP Basis Consultant- Implementation
Organization Infotech Enterprises, Hyderabad
Duration June 2008 to May 2009
Role Description
·
Installed
Dev -> QA -> Prod systems
-
Sandbox -> Refreshed from production every month
-
QA -> Refreshed from production system every month
-
Training System -> Refreshed from production System on Requirement base
- Environment: ECC 6.0, Oracle 10g, Windows
·
Performed System refresh activities for the
landscape.
- Performed Post installation activities for the system landscape.
- Change request transport, Transport management
- Monitoring Background jobs, re-scheduling, canceling long running
jobs
- File system monitoring
- Providing Missing Authorizations to the users
- Spool & print management
- Checking Failed update record & system logs
- Short dump analysis, managing lock entries, lock/unlock
transaction codes, displaying and monitoring of Database and Application
servers, managing user sessions
- Handling Transports from one System to another System. (DEV, QA
& PRD)
·
Maintaining of Operation Modes and Profile
parameters
- Implemented Kernel Upgrade and Applied
Support Packs
- Set up Central User Administration (CUA) to manage multiple
systems/clients
- CUA for all systems from SOLMAN
·
Contribute to the documentation for the various
tasks that we perform for daily monitoring
·
System Refresh Activities, JAVA Schema Export
& Import
·
Package deployment using SDM
·
Trouble shooting and monitoring with printers and
system hardware
Project#3 GCM
Client GE Capital Modspace
Role Associate SAP Basis Consultant
Organization Intelligroup, Hyderabad
Duration June 2006 to May 2008
Role Description
§ Day to day monitoring of systems and reporting to the Management
§ Monitoring application servers up and running
§ Monitoring work processes and their statuses from time to time
§ Maintaining the instances using operation mode and assigning time
intervals
§ Monitoring the background jobs and their status
§ Scheduled standard background jobs periodically
§ Monitoring Logged Users locally and globally
§ Monitoring activities like system status, analyzing system logs, system
traces, ABAP dumps, SAP System Buffers and Database Buffers, workload analysis
§ Reporting problems like Startup, Background jobs, updates, System
status, work processes, System logs, ABAP dumps, Memory issues
§ Creation of Single and mass users
§ Performing User comparison and Utilizing SU53 to optimize missing
Authorization
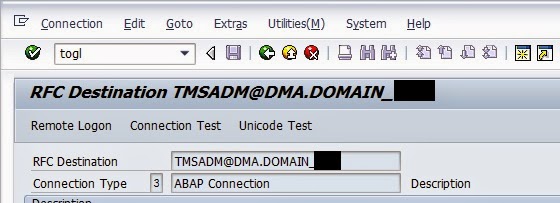
§ Creating and testing the RFC destinations
§ Client administration which include creation, deletion, export and
import
§ Maintaining system profile parameters and Dynamically customizing
profile parameters
§ Created system messages when downtime is scheduled
§ Involved in applying of SAP Support Patches, R/3 Kernel Patches and
upgrade of other SAP executables for fixing SAP bugs and smooth system runtime.